Georeferencing with QGIS (Version 3.18 Zürich)
Bas den Brok - mapping course
Quick notes to remember what needs to be done
Almost no understanding of QGIS required.
Beginners level. Very easy.
Also see here:
https://docs.qgis.org/3.22/en/docs/user_manual/working_with_raster/georeferencer.html
Or here: https://gis-university.com/georeferencing-in-qgis/
Or explanations on Youtube.
We will georeference a scanned map in PNG-format and produce a georeferenced tiff file i.e. a
GeoTIFF-file.
Our scanned map is a Swiss map on which cross lines of the Swissgrid CH1903 are visible;
we want it referenced with exactly that Swissgrid CH1903 coordinate reference system.
Open QGIS
GO TO: Raster > Georeferencer (Note, from version 3.26 onwards: Layer > Georeferencer )
Georeferencer window opens.
GO TO: File > Open Raster
Select raster-file, e.g. a TIFF-, PNG- or JPG-file.
This file is referred to as the source file.
The map appears in the window. Source file coordinates are visible in lower right corner of the window. Move the cursor and you see them change.
Source coordinates X and Y have their origin 0,0 in upper left corner of the PNG-file with X positive to the right and Y positive going up. This is nice
to know but not important now.
Enlarge the map and use pan (hand symbol) to move to find suitable "Groud Control Points" (GCP’s) of which you know the coordinates. In our most simple
case we select the cross points of the grid lines on the source map. In order to select them:
GO TO: Edit > Add Point
Klick the desired GCP.
The "Enter Map Coordinates." window pops up:
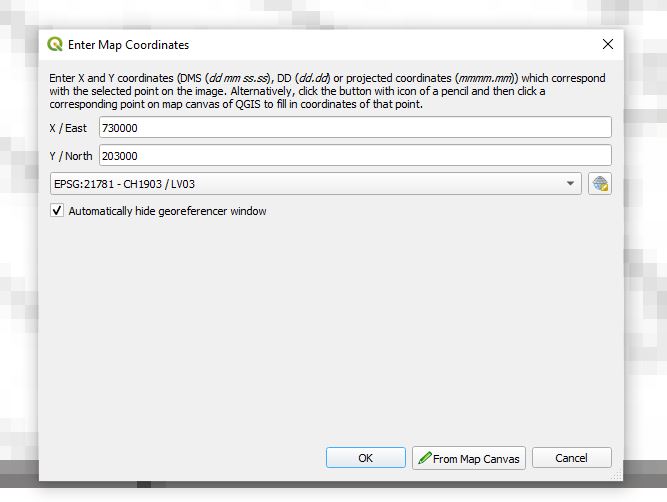
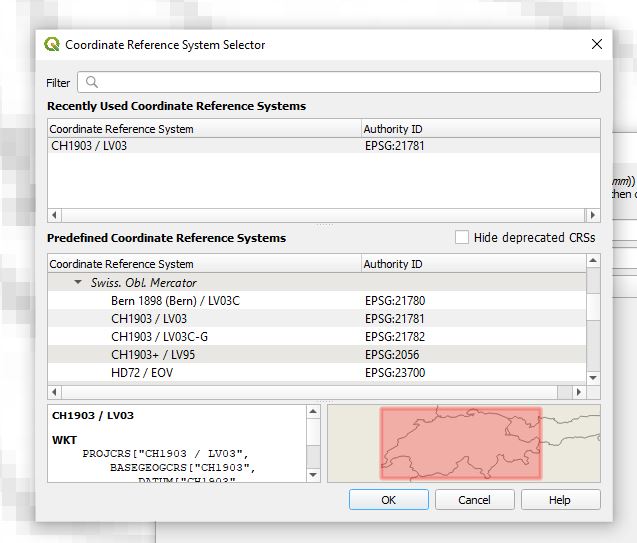
Manually enter X and Y (Swissgrid coordinates) of the selected GCP, then select the proper projection, in our case: EPSG:21781 - CH1903 / LV03.
See here: https://epsg.io/21781
And here:https://de.wikipedia.org/wiki/Schweizer_Landeskoordinaten
Enter OK and do the same for at least three, better four, and in case of poor quality copies or old maps more than four times.
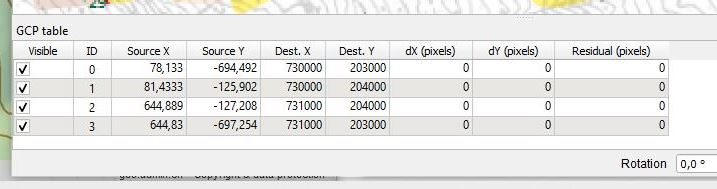
The old and new coordinates of selected points will appear in the GCP table. Shown are Source X and Source Y coordinates of the source file, as well as Dest. X and Dest. Y i.e. the new
(manually entered) coordinates of the destination file, Swissgrid CH1903 coordinates in our case.
GO TO: Settings > Transformation Settings
Make sure that Output raster i.e. filename of new georeferenced file (Geotiff) is entered
and that the Target SRS (SRS = Spatial Reference System) is selected right, i.e. EPSG:21781 - CH1903 / LV03 in our case.
GO TO: File > Start Georeferencing
The georeferenced file will be saved and eventually be loaded immediately in QGIS.
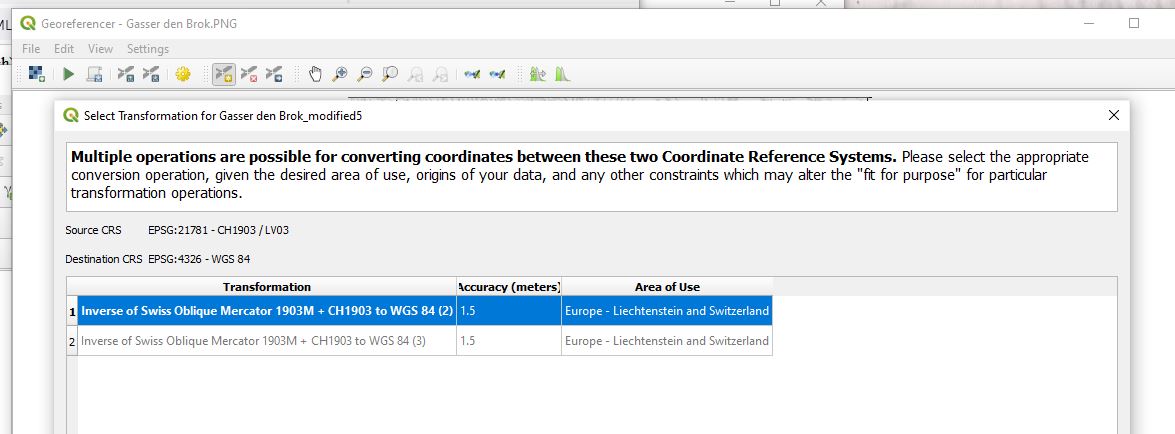
Dont’t forget. In case you get the following message. Press OK or press "cancel" and it’s okay.
When you open the georeferenced Geotiff file in QGIS (Layer > Add Layer > Add Raster Layer) you will see that the predefined Coordinate Reference System (CRS)
as indicated in the lower right corner (in my case EPSG 4326 i.e. WSG 84) will change to the one of the Geotiff file (in our case to EPSG 21781
i.e. CH1903 / LV03).
Finished, ready, خلاص